
So, you want to get noticed on LinkedIn? You’ve likely already opened an account, spent hours creating the perfect profile, uploaded a great headshot, and crossed your fingers you’ve just opened the doors to your dream job. Then one day a recruiter asks why you don’t show your profile picture. You’re stumped. You open your profile and see your smiling face staring back at you. “Are they looking at the wrong profile?” you wonder. “Maybe it’s a glitch on their computer?” Although both are possible explanations, the most likely is that you’ve actually set your profile picture to only be visible to your network (only people up to 3rd level connections).
You may not have even known this setting exists or why it’s even important? You are likely on LinkedIn for the purpose of networking or job searching, and the best way to create connections is through images rather than text. Just ask Instagram, an app devoted to social networking by use of photos. It is quite natural to want to associate a name with a face along with their background. What is the first thing you do when you are going into a meeting or interview? Most people jump onto LinkedIn to view the profile of the people they are meeting. And what is one of the first things you notice upon opening a profile? The photo! Photos make first impressions. They make statements about your personal brand. Photos allow people to feel more connected to you. Without a photo you become just text on a page rather than a memorable human being. If your photo does not appear to recruiters, it can impact whether that recruiter decides to reach out or skip over you. If you’re in a customer facing profession, one would wonder why you aren’t leveraging this aspect of social selling or making your best effort to connect with customers.
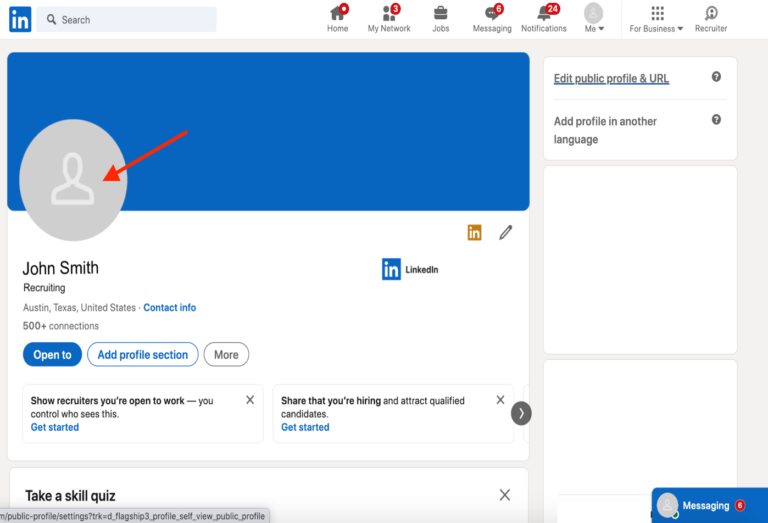
Great news, this is easy to fix! First, check out who can view your profile picture. Go to your profile and click on your profile photo.
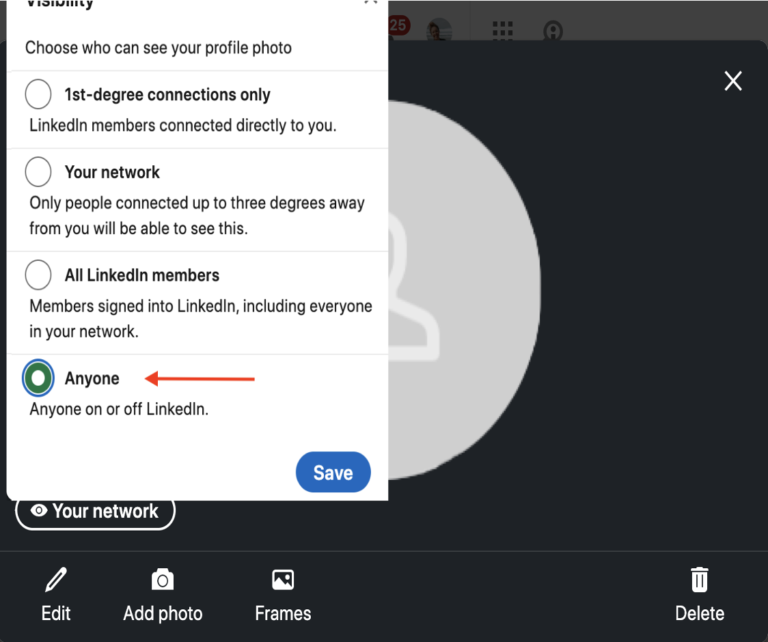
In the bottom left-hand corner is an icon in the shape of an eye with one of four possible phrases: “1st-degree connections only,” “Your network,” “All LinkedIn members,” or “Anyone.” If you want to broaden your reach and make more connections, chose the “Anyone” option.
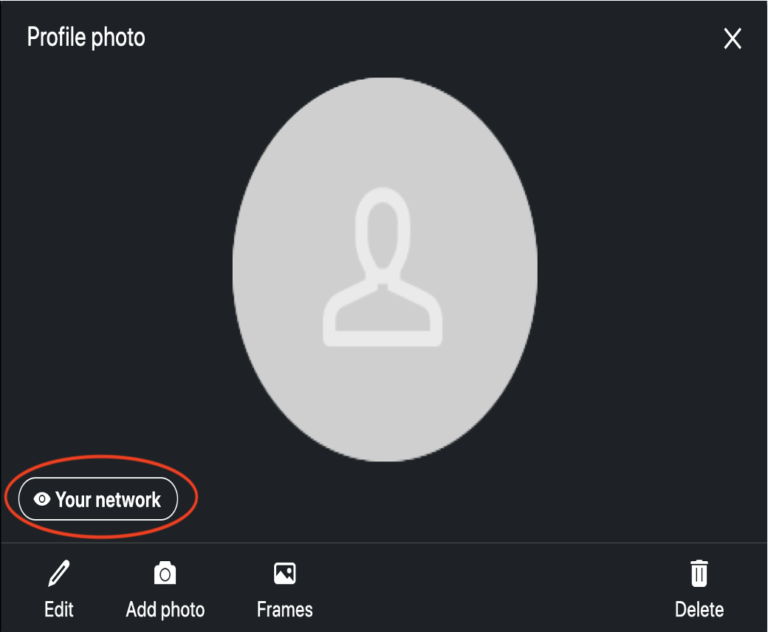
If you would like to change this setting, click on the eye and a menu of these options will appear. Select the option that best suits you and click “save.”
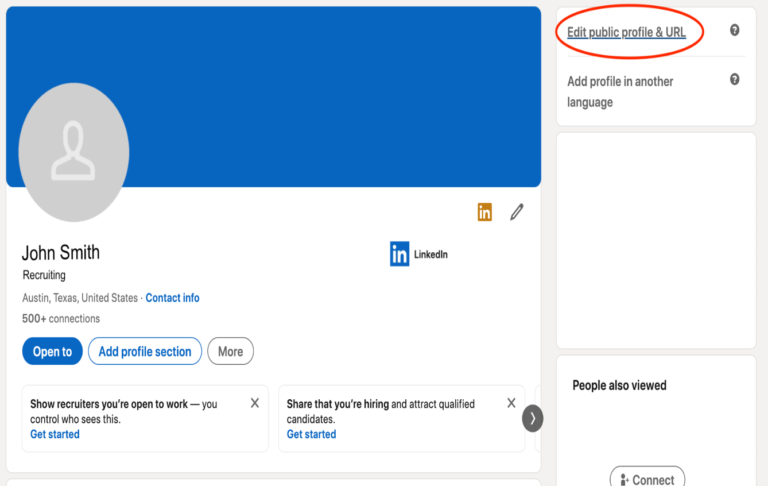
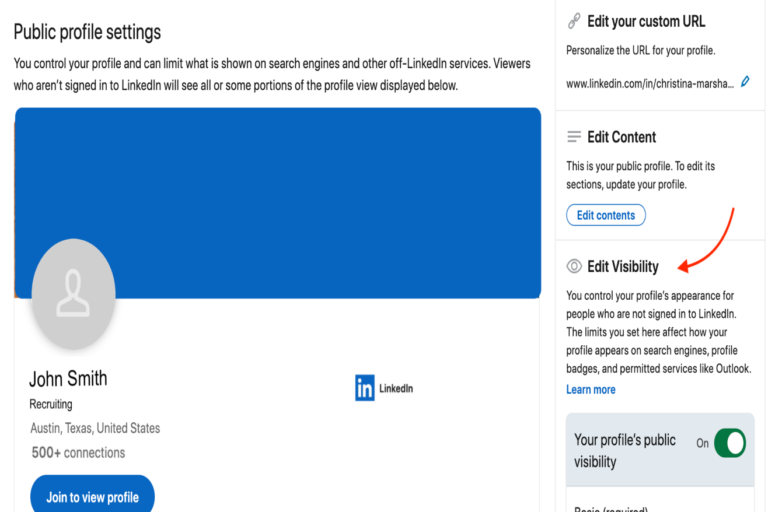
If you are having troubles, try the alternative settings page that you can access from the opposite side of your profile. In the top right-hand corner of your profile page you will find a link labeled “Edit public profile & URL” that will open a new tab.
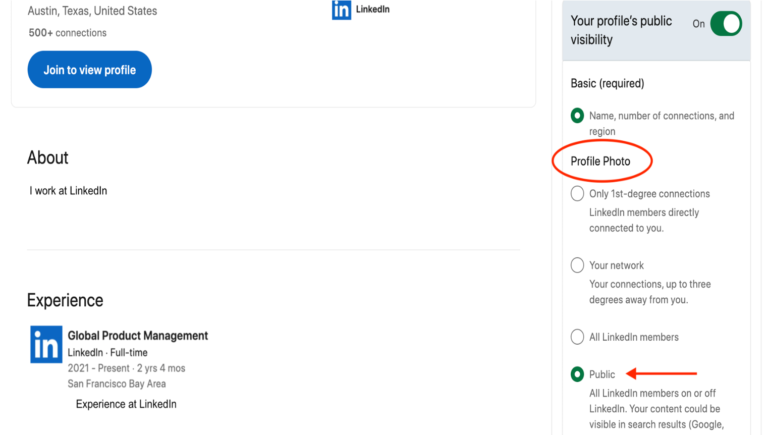
Once you’ve opened the new tab you will see a panel on the right-hand side of your screen with various options. Scroll down until you see “Edit Visibility.”
Keep scrolling until you find “Public Photo.” Then you can choose the option that best suits your needs.
Once you’ve followed these steps, you won’t have to wonder if your connections can see you now!
For tips on choosing the right photo for that first impression, check out our LinkedIn Photo Guide blog: https://marshallinsight.com/2020/04/24/a-guide-to-your-linkedin-photo-3-tips-for-making-an-impact/